Painting ladybugs over water with acrylic
Many of my recent paintings have been made using at least one or two reference photos. Therefore I figured it is in my best interest to also try to do a painting solely from my imagination and see how it turns out. So I decided to do another ladybug painting, since I have become very familiar with their anatomy and the way light bounces off of their backs.
My first step was to get out some cardstock paper and my promarkers, copics, and studio 71 markers, as well as a pencil & pen. I sketched out my idea with the pencil and then used the markers to fill it in with color.
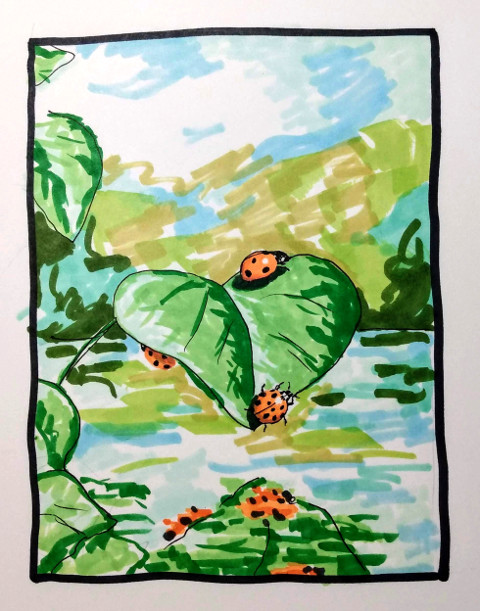
I put some effort & attention to detail in the ladybugs, but everything else I just scribbled in. This is generally what I do in my artwork, I add details to the focal points, but everything else I leave fuzzy & somewhat unpolished.
The next step was to get out my gessoed hardboard panel, which already had a dried base coat of light green, and start sketching on it with a pencil, using my marker sketch as a loose reference. Then, I filled in the basic shapes with the appropriate colors in acrylic paint.

The ladybugs at this point I just filled in with a very light peach color, I didn't want to start working on them too much yet this early on.

Here I worked on the background, the water, the leaves, and then I worked on the ladybugs. I work on everything in the background first, because if I start with the foreground objects(like the ladybugs), then when I switch my attention to the background I would have to be super careful when I'm painting around the ladybugs so I don't paint over any of their edges.
At this point I noticed 2 problems with the artwork that were bothering me. First of all, there's not much contrast between the green in the background and the green leaf in the foreground that the ladybugs are on. So I decided to darken the greens in the background when I work on the next layer. The second problem is the ladybug's reflection in the water. It isn't directly below. It's slightly moved to the right, so I decided to shift it slightly more to the left in the next step.

At this point I just needed to focus on the ladybug reflection.

Here I worked more on the ladybug reflection as well as the leaf reflection. I did my best to put in some horizontal smears to give the effect of water distortion.

To finish off the painting, I signed my name in the bottom left corner. Shortly after this I realized that some water droplets around the main ladybug and some dripping off of it would look very appropriate, so I quickly painted it in using the same detail brush that I used for my signature.
Finished!


Comments
Post a Comment